Rain Gardens: Natural Feature Makes the Most of Soggy Areas

 April showers bring May flowers—and sometimes, they bring mud and other soggy problems to your landscape. If your garden has drainage issues, or if you’re just looking to add a charming natural feature to your property, have you considered a rain garden?
A rain garden is essentially a low spot in the terrain, lined with plants and permeable materials, that is designed to capture rainfall and allow it to soak into the soil. It’s an especially useful feature in Virginia, which enjoys upwards of 40 inches of rainfall annually. In the suburban landscape, roofs, driveways, patios, and even compacted lawns produce runoff which can, if not properly managed, cause issues in your home and garden. While gutters, downspouts, drains, and sump pumps are all effective (though not particularly romantic) methods for managing and directing excess water, a rain garden can be a helpful, attractive part of the plan.
Having a rain garden is beneficial in several important ways: It can help prevent costly damage by redirecting water away from structures; it helps control erosion, standing water, and soggy lawns; it aids in preventing water pollutants from joining streams or the water table by capturing and filtering them through soil and plants; and it provides habitat for wildlife. Not to mention that it looks fabulous—far more appealing than a mushy patch of grass!
 Location & Planning
The first and most important thing to do when installing a rain garden is to figure out the right location. During the next rainfall, take note of where the water goes. Does it run down your driveway? Do downspouts empty into your garden? Your rain garden will need to be situated in a low spot where water either runs or can be directed. You won’t want it to be near any structures on your property, including retaining walls, and you’ll also want to make sure it’s not too close to your property boundaries, where it could overflow onto neighboring gardens or sidewalks. A good guideline is to leave 3 to 5 feet of clearance from boundaries, and 10 feet from your structures. Make sure there’s nothing beneath the spot you’ve chosen, and always call Virginia 811 for a utility survey before you dig!
Ideally, the spot you’ve chosen will receive runoff, be relatively flat, and have good drainage. Adjustments can be made to improve the site, however. Downspouts can be repositioned if needed, and water can be directed to the rain garden by means of pipe or a swale, which is a low channel dug into the soil to funnel water through the landscape. If the rain garden is situated on a gentle slope, a berm (man-made mound) can be built on the downhill side to improve water retention. Rain gardens need well-drained soil or they’ll overflow, so if your site has compacted or clay soil, amend it with compost to improve drainage. Fine gravel can also be incorporated if necessary, but it might be best to avoid sand if you have clay, because certain types of clay and sand can actually stick together and make the soil compaction worse!
 Construction & Materials
Once you’ve got your spot and conditions are right, dig your rain garden about 18 inches deep, and amend soil as needed for drainage. Make sure the rain garden basin is level and that the perimeter is gently sloped to avoid erosion of the sides. Take care that any excess water will not run toward buildings or directly onto your neighbor’s property.
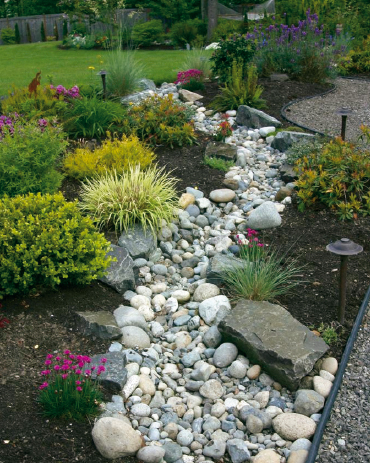
In the lowest level of the rain garden, plant species that can handle periodic saturation. If drainage is especially slow, consider native rushes, sedges, wetland species such as Sweet Flag, or even pea gravel or river stone. (Stones can also be used in a connecting swale for an attractive, dry-creek-bed appearance.) For the middle portion of the rain garden, many types of ferns do well in damp conditions; maidenhair, Christmas and cinnamon ferns are some varieties to consider. For the top level, you can install pretty much any kind of plant that will work with your area’s soil and light conditions. You might want to put shorter varieties around the edges where they will be visible, and place taller ones inside or a bit lower on the slope. Extending the plantings you use for the rain garden out into your yard will help blend it into the landscape.
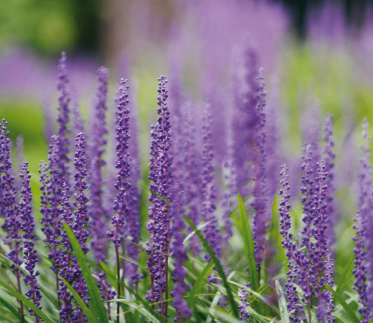
 As far as specific plants to consider, native species are preferable if you can find them. They will have the advantage of being more readily adaptable to your site and its conditions. Ask your local nursery for recommendations. Otherwise, shrubs such as red twig dogwood, holly, and swamp azalea, and perennials like liriope, coneflower and aster will provide visual interest and help anchor the soil with their root systems. Using a mix of evergreen and perennial plants will provide year-round interest, while planting fairly close together will help control weeds and erosion. When creating your garden layout, be aware of each plant’s fully grown dimensions so that you can space plantings accordingly and design a rain garden that will allow the various plants to be seen.
Once the plantings are in, top it off with some mulch to help control weeds and retain moisture while the plants become established. Use a heavier mulch that won’t float away in heavy rainfall, and be sure to water regularly during the first season while root systems are developing. Your rain garden will need occasional maintenance to ensure it doesn’t become clogged with sediment, and you may find that you need to move or replace certain plants because of varying degrees of wetness around the area.
With a bit of planning and some muscle, you can turn a problem area into a pretty landscape feature. Building a rain garden will not only create an enchanting and environmentally conscious focal point on your property, it will ensure that, when wet weather comes, nothing will rain on your parade.
aster, Christmas ferns, cinnamon ferns, coneflower, Downspouts, erosion, evergreen, excess water, ferns, holly, liriope, maidenhair, pea gravel, perennial, rain, rain gardens, rainfall, red twig dogwood, river stone, standing water, swamp azalea, Sweet Flag


