The Holly and the Ivy | Homemade Garlands, Swags & Topiary
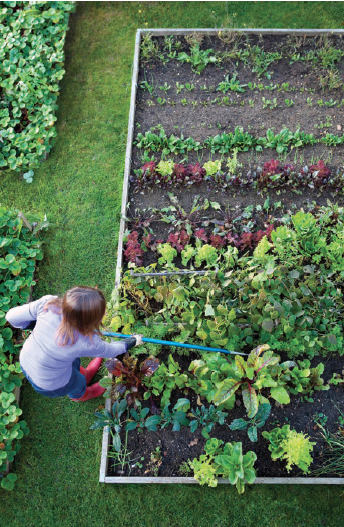

As a child I remember Christmas Eve at my parents’ house in Lynchburg. The tree would have been decorated a week or so earlier and tree lights would finally be switched on that night after the long waiting season of Advent. My sisters and I would be there with our mother on the kitchen floor amid great piles of greenery, helping her make the tabletop boxwood trees she created each year. We’d trim tiny sprigs, poke them into the topiary forms she made, give them a haircut when complete and decorate them with tiny lights and ornaments.
I still love to make my own natural decorations, so this time of year, my husband and I forage for whichever evergreens, berries, cones and magnolia are prettiest, from our backyard or our generous neighbors. These decorations are more than simply beautiful and great fun for the family; they’re also thrifty during this season.
 Fresh tabletop topiary tree
These are traditionally made with boxwood. Roanoke Valley Garden Club suggests, “Hollies and rosemary are beautiful substitutions, though holly can be prickly to handle. Tabletop trees can also be made with lemons, lady apples, rose cones, even unshelled nuts.”
MATERIALS
- 12-inch cone-shaped foam topiary forms
- Garden clippers
- 8 large branches of fresh greens
- Floral wire
- Wire cutters
- Pot, urn or planter
Topiary forms are available as cones, spheres, half spheres and tiered. Select a form—we used a cone—and an attractive pot that fits. (It’s important to buy a container that is big enough. Once greens are added the finished topiary will be much larger than the form.) Use the clippers to trim branches off a large boxwood. Trim sprigs down even further to about 2- to 3-inch pieces. Cut just above a row of leaves for the best results. For a cone-shaped topiary, create four or five bunches of boxwood sprigs with three or four springs bundled together with a length of florist wire. Tuck those bunches into the top of the form. Working your way down, cover the topiary form with bundled bunches of boxwood sprigs, leaving an inch or two around the bottom uncovered. Pot the topiary, and make sure all the foam is covered. Add individual boxwood sprigs to bald spots. Secure the form with a dab of hot glue to the bottom if needed. Trim leaves with scissors to groom the topiary. Keep out of intense, direct sunlight and mist with water every couple of days to keep leaves hydrated and looking their best (adapted from HGTV).
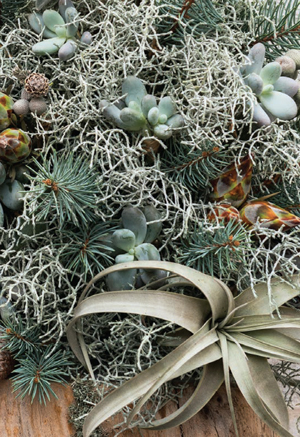 Succulent topiary
This project can be started before first frost; enjoy your topiary indoors from now through winter. Emily McCahill of Bay and Branch Plant Design in Roanoke offers helpful advice: “Once outside temperatures dip below 40 degrees move the plants inside.” The succulent topiary can be a beautiful, early accent for the holidays, and add cheer to the bleak midwinter months that follow.
MATERIALS
- Long-fibered Sphagnum moss
- Fishing line (monofilament)
- Gloves
- Light floral wire
One of the oldest forms of sculpture, the traditional art of topiary involves meticulous pruning and shaping of plants over years to create 3-D masterpieces. Creating your own topiary is easier than you think, and succulents are great starter plants for this project— easy to propagate, low-maintenance plants with compact growth habits that maintain a tight form over time.
Collect or purchase plants that are compact in form and maintain the shape of your topiary, from a generous friend, florist or supplier. If you purchase potted plants, clip off at stems for the topiary but keep the pots, as these will regrow quickly to a full plant. Remove the lower leaves from about an inch of stem; this will be the part that you use. Do collect plants a few days before assembling your topiary so these new wounds can callous over. Find an ample and sturdy frame. Finished topiary is heavy, so choose a wide base to support the weight of the plants and planting media. Shapes can range from traditional to whimsical.
Sphagnum moss works well for topiary—it holds water, is easy to compact and will expand to hold cuttings and small plants in place until they root. Soak the sphagnum moss in a bucket of water until fully saturated. Wearing gloves, fill the frame with sphagnum moss. If the spaces in your form are too wide to keep the moss in, use a light floral wire to create a netting that restrains outliers. Pack moss into the form tightly to give the topiary a strong foundation. Start small as you pack it in, then fill the form densely until the form is almost hard to the touch. If you can push your finger in and make an indent then you need more moss. Don’t worry about escapees; this densely packed preparation of the moss will make it look like a store-bought topiary. Use the fishing line (invisible in the reveal to come) to wrap the frame tightly over and over until all of the small pieces are pulled in. This is the rewarding part of the process.
Planting your cuttings in the prepared frame is as simple as using a pen or pencil to make a hole in the sphagnum moss. The moss should be tough to poke the pen into, so move quickly to push your succulent stem into this opening after the pen is removed. The opening will stay visible for a few seconds before the moss starts to tighten back in around the stem and hold it in place. Work with the largest cuttings first and finish with the smaller ones. Using an assortment of different plants will add color, texture and whimsy to your topiary; achieve a more formal look by using a single variety for the entire frame. Your succulents should be rooted in two to three weeks. Keep the frame in a bright area and resist the temptation to water often. As the sphagnum moss starts to dry out it will turn lighter in color—an indicator to you that it is time to water the form (adapted from World of Succulents).
 TOPIARY CARE: Your succulent topiary will grow and spaces will fill in over the next couple of months. Most topiary forms with succulents need to be watered once a week. For best results, shower the frame with water for several minutes until the moss is fully saturated. A light application of water soluble fertilizer every other month will keep your plants healthy. If your topiary starts to look a little “unruly” as plants begin to grow, take a pair of pruners and cut back any long plants. These will soon regrow and the pieces you cut off can fill in gaps or be the start to your next project (misssmartyplants.com).
Magnolia garland
MATERIALS
- 25 or so magnolia branches with five or six shiny leaves each
- Floral wire
- Wire cutters
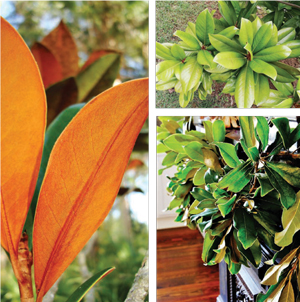 If you don’t have your own magnolia tree, make friends with someone who does. You will need about 25 branches to make this garland. Clean the leaves thoroughly before you begin. Cut a few pieces of floral wire approximately 6 to 8 inches long. The wire should be lightweight, but strong enough to hold the branches together—26 gauge wire works fine. Begin by twisting the wire on the end of one of the bundles. Attach the end of one branch to the beginning of another. Loop around several of the bottom smaller stems for support. When you’ve finished with the first branch, wire to the end of the next branch, hiding the wire as best you can as you go along. Work in this manner, hiding the wire, branch after branch. Continue the process until the swag is three feet long. Check the swag for stability; secure with additional wire in places that appear to be weak. Repeat the process until you have finished three, 3-foot lengths of garland. Attach one end of two lengths to each end of the mantel. Let them hang down; find the mantel’s center and attach the third length at its center. Use whatever hardware or adhesive is appropriate to your surface. (Note: I use hidden nails; I’ve tried tape and even command hooks, but if you light fires often during holidays, tape adhesive fuses somehow with the paint and makes removal difficult.) Finally, wire the three lengths of garland together to form two swags. Test for weak areas and reinforce if necessary (adapted from Thistlewood Gardens).
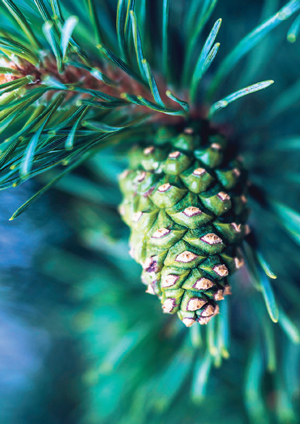 Fresh white pine garland
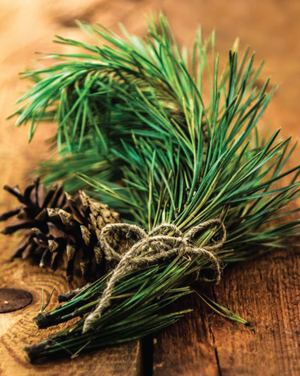
Go fresh with garland, and you’ll never again be tempted by the artificial variety. There’s no better way to start the season. I use white pine but cedar, holly and fir work equally well.
MATERIALS
- Assortment of fresh greens
- 1/4″ hemp rope or similar
- Floral wire
- Pruning shears
Pine, cedar, holly and fir branches all work well in fresh garland. Use a single type of foliage or mix a few varieties of greens into a pattern. Accent with pinecones or holly leaves—their red berries pop against the green of the boughs. Whatever you choose, snip branches that are between eight and 18 inches in length. Make this an opportunity for thoughtful pruning; avoid cutting too many pieces from the same small tree and choose branches that are touching the ground, the sides of a building, or the branches of neighboring trees. Counterintuitively, the place to begin seems like it should be last. Tie a loop at the end of your rope, so you can hang your completed garland. Next, use floral wire to attach your first piece of greenery to the rope. Wrap the wire two or three times around the branch until it’s securely in place. Be sure to position that first bough in such a way that it hides from view, but does not completely obstruct, the loop that you tied into the rope. Lay a second piece of greenery so that it slightly overlaps the first, hiding the floral wire that binds it to the rope. Then tightly wrap additional wire two or three times around the second piece, just as you did for the first. Continue adding greenery in this way, piece by piece, until your garland reaches the desired length. Cut the rope so that it’s two or three feet longer than your garland. That extra rope may come in handy as you set about hanging the completed garland. Tie a loop at this end of the rope to match the one you made in Step 1. Once the garland is hung, spot-check it for bare sections, wiring in additional boughs where necessary. If the garland is too long for the space in which you’re going to display it, simply snip it to length with pruning shears and use the excess elsewhere in your home (adapted from Bob Vila).
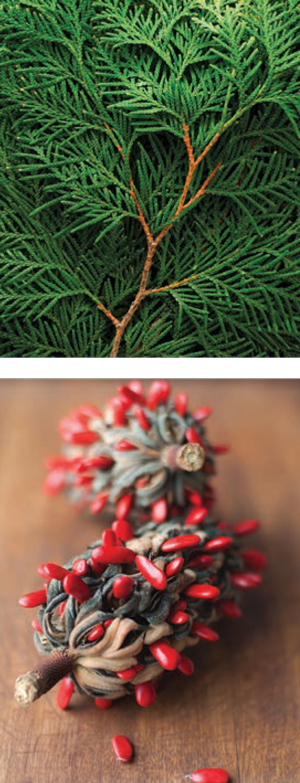 Easy greenery swag
This simple project takes 30 minutes or fewer. Make an easy and festive holiday swag out of magnolia leaves and other natural materials to hang under windows or on your front door as an alternative to a wreath.
MATERIALS
- Magnolia leaves
- Magnolia seed cones
- Fresh greenery, such as small pine branches or Fraser fir cuttings Staple gun and staples
- Floral wire
- Wood board
- Wide holiday ribbon or pre-made bow
Choose the biggest, prettiest, shiniest magnolia leaves and cones and clip them off the tree. Orient the board. If you’re making a window swag, arrange horizontally; for a door swag, work vertically. Start by arranging the first several rows of magnolia leaves in a pattern on the piece of board. If you’re making a horizontal swag, the leaves can point up and down and they can fill the space around each end. For a vertical swag, crisscross the leaves facing downward, except at the bottom, where they will fill the space around each end. Fill the staple gun and begin stapling leaves to the board. For a vertical swag, staple the crisscrossed stem tips together to the board. For a horizontal swag, place the tips of the stems up and down, one on each side, and staple to the board at the same time. Don’t worry about visible staples which can be covered up later. Use additional leaves to fill in gaps and hide the staples. Once the swag is filled out, staple some stems underneath other leaves to hide as many staples as possible. Use floral wire to bundle two or three seed cones, then attach to the board in the same manner. For a vertical swag, select a long pine branch to extend down the center of the swag, nearly to the ends. For a horizontal swag, select several branches to extend out from the middle; bunch and tie them together with floral wire and attach with additional greenery or holly berries if desired. Using wire clippers, tie a 2-foot length of wire; this will be used to secure the wreath. Horizontal swags can be secured using several foot-long pieces of wire. For vertical swags, wrap the wire around the swag, twist and secure tightly. With the excess, create a loop that can be used to secure the swag to a wreath hanger or hook. Attach a festive bow to complete your holiday swag, then hang and enjoy! (adapted from Home Depot) ✦
cedar, Features, fir, garlands, greenery swag, holly, ivy, magnolia, Pine, Sphagnum moss, Succulent topiary, Swags, tabletop topiary tree, Topiary, white pine


